Squash Blossoms

I used to work with a guy that grew up in Italy. Like me, he loved to cook.

I asked him one day — “Alessandro, what’s your favorite thing to make?”, thinking I’d get a pasta dish or a great pizza recipe.

“They’re really hard to find, but when I can get them…squash blossoms. No question”

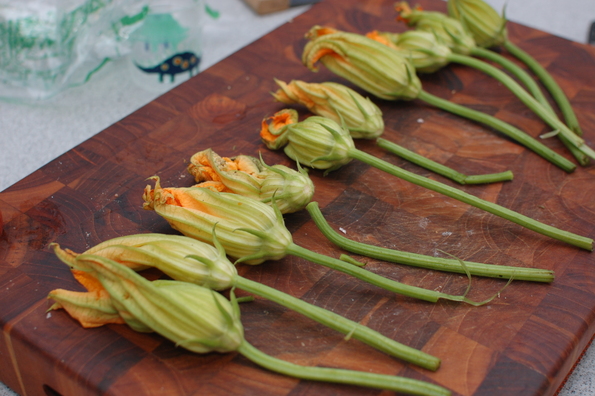
As it happens, a few weeks later I was in a farmers’ market and saw a nice looking bundle of squash blossoms. Without overthinking it, or finding a recipe, or planning anything out, I grabbed them.

The difficulty with squash blossoms is that you have to use them immediately. Like, same day. We had other dinner plans that night, but this opportunity was too good to pass up — I had never cooked these before myself, and I don’t think I’ve even eaten them in a restaurant.

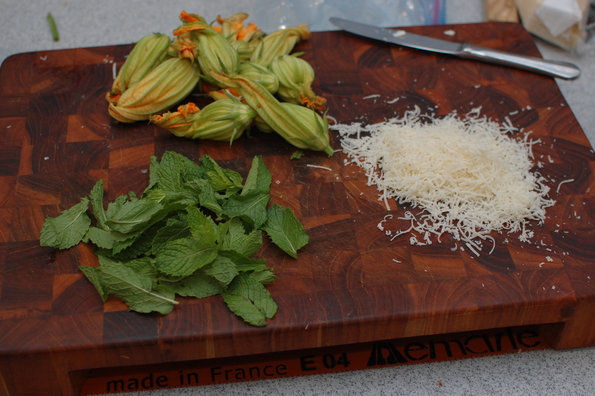
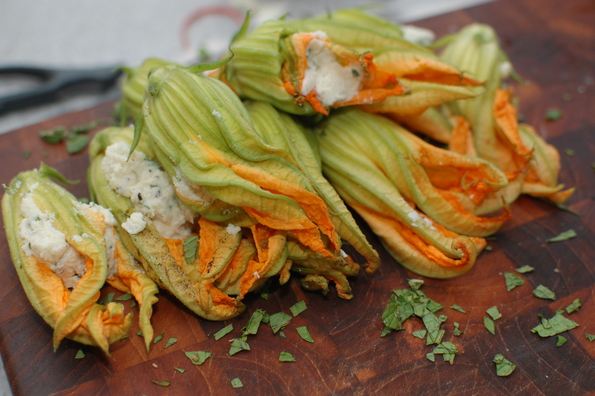
A quick search found a simple recipe of mint, parmesan, egg. Whisk the filling together, and pack it into a ziplock bag. Cut the corner off, and pipe it into the blossom.

Then, whisk together some flour and some very cold club soda. Give each blossom a quick dip, and then fry in a heavy cast iron pan with 375 degree oil until you get a nice golden brown color.

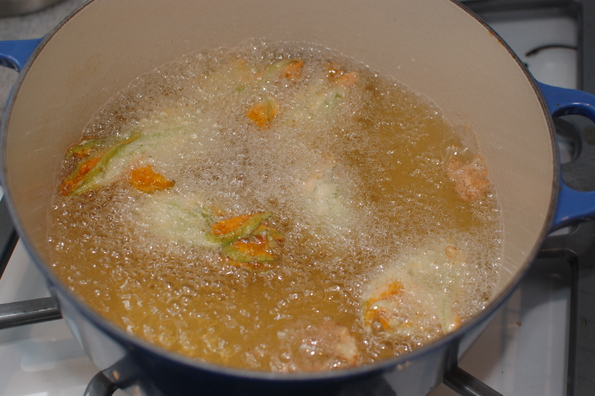
Dip them into some warm tomato sauce immediately after frying — if you’re not close to burning your mouth, you’re waiting too long. These are best right out of the oil. (Ok, but don’t actually burn yourself).

What really works here is the delicate tips of the flower grab a nice coating of the batter and get super crispy. The creamy minty savory filling works perfectly with the crunch and sauce to deliver an addictive appetizer.

Good call Alessandro!

Blistered Green Beans with Roasted Tomato Almond Pesto

This may just be my new favorite vegetable recipe. Well, let’s say green vegetable because it’s pretty hard to beat a perfect bruschetta in the middle of tomato season. But this is a close second.


DSC_0558

The secret is in the caramelization of, well, everything. The green beans have to be blistered, and the tomatoes charred. The almonds toasted to a deep brown. Put it all together and you have a collection of flavors that simultaneously complement and contrast each other.

First, the tomatoes. I’m going to admit it — I cheated. Well, I wouldn’t exactly call it cheating — I made this in November, and it’s a fairly well known fact (well, at least I know it!) that good canned tomatoes are much better than the off season fresh ones you get in the supermarket. So I did a little experiment: I used whole San Marzano tomatoes, out of a can, instead of fresh cherry tomatoes. I know! Heresy.

But you know what? They turned out great and I would do it again in a second. The secret is to keep the tomatoes relatively whole, except make a small hole with your finger and squeeze out the liquid in the middle. Give them a quick pat to dry, and then toss them with a light coating of olive oil and arrange them on a sheet pan so they’re not touching. Roast them around 350 until the edges start to get black. When they’re done, scrape them up with a spatula and proceed as normal. By the way — roasting canned tomatoes like this works to add a huge flavor shot to all sorts of stuff like dips, sauces, hummus, etc.

Next, the green beans. I got out my cast iron skillet, cranked the heat up and got some vegetable oil just at the point of smoking. Toss in some washed (but very dry!) green beans and let them sit until they’re thoroughly blistered. Then give then a turn.

Here’s where it all gets good — combine half of the tomatoes with the almonds (and the rest of the ingredients — see the recipe!) and give it a whirr in the food processor. The pesto that results is good enough to eat with a spoon, and even better on top of the blistered green beans.

Toss it all together and consume voraciously!


Recipe:
http://www.bonappetit.com/recipe/blistered-green-beans-with-tomato-almond-pesto


(Ha! Mine doesn’t look like Bon Appetit’s version! Looks like mine has more tomatoey pesto goodness — I’ll take it!)

American Barbecue in a Japanese Grill

Kamado grills, which most Americans know by the Big Green Egg brand, are renowned for rock-solid temperature control, a wide range of cooking intensities, and incredibly barbecue flavor. Costco recently carried the Vision Kamado grill, which is a pretty strong competitor to the Big Green Egg at a great price. I picked one up recently, along with a nice piece of brisket, and took a low-and-slow spin in the backyard.

DSC_5144

My last foray, several years ago, into real barbecue began with a big hole in my parents’ backyard and ended with the less-than-fully-cooked pork shoulder spending some time in the oven. Although ended up tasting great, I was looking forward this time around to having more control over the process than a shovel had given me.

Loosely following the instructions at AmazingRibs, I first dry-rubbed the brisket and let it sit in the fridge overnight. Early the next morning, I filled the fire bowl on my kamado to the brim with natural charcoal, added some hickory chips and lit it up. When the temperature hit 225F, on went the brisket. After about 9 hours (and, more importantly, an internal temperature of 204F), I took the meat off and put it in a cooler that had been warmed slightly, and let it sit for about 90 minutes.

DSC_5126

The meat was a huge hit. A few observations that worked well for me:

  • Some sites (AmazingRibs included) talk about trimming the fat cap and other even suggest it. Don’t trim the fat cap. Brisket is a fairly lean cut, and that fat is delicious in the final product. If you don’t want to eat it, cut it off your own piece, but don’t deny your guests the succulent fat
  • Take advantage of the long rest as you time dinner. The rest period can be anywhere from about 20 minutes to almost 2 hours. Use this time as slack as you prepare the other stuff and pull dinner together.
  • A good thermometer that you can put in the meat is key. This saves you from having to continually open the lid

Check out AmazingRibs for directions and the recipe for the dry rub.