Grandpa’s Dumplings

Growing up, my mom’s mom was the undisputed queen of the dumpling. My maternal grandma and grandpa owned a Czech restaurant called the Country Kitchen (no relation to the chain) that specialized in all the favorites: roast pork and dumplings, svickova (marinated beef with a sour cream gravy), koprova (dill pot roast, yep, sour cream gravy) — the list goes on. Her dumplings were generally yeast dumplings, perfect sponges to soak up the gravies. All of her food was delicious, homemade, and the perfect winter meal to fatten you up and entice you to spend the rest of the night curled by the fire.

DSC_5265

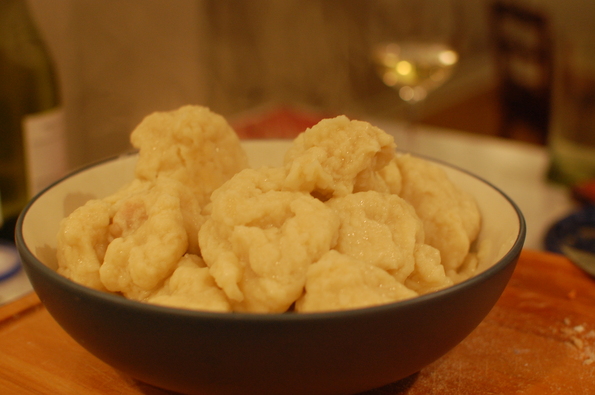
Today, however, I highlight my dad’s dad’s dumplings. I made them last night, and that probably was the third time in my life that I’ve eaten them. I’d consider my grandma’s dumplings “the ones I grew up with”, but my grandpa’s as an exotic spin — familiar as a bready pork accompaniment, but unlike the gravy soakers I was used to. His are an egg dumpling, devoid of yeast, described by him and others half-derisively as “sinkers”. They’re heavier than a yeast dumpling, but chewier and somehow more satisfying.

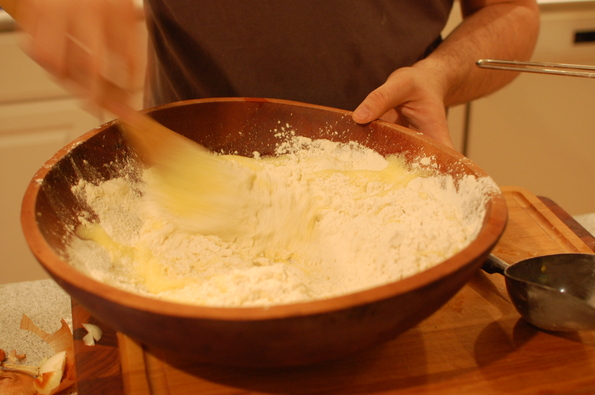
Old time recipe calls for a wooden bowl, this will do!

Old time recipe calls for a wooden bowl, this will do!

DSC_5213

Part of the fun making this recipe was deciphering the handwritten version, most recently transcribed in the mid 90’s, but undoubtedly passed along for at least a few generations. If you’ve never recreated a dish passed down by your grandparents, do it! The recipe itself is simple, but the results fantastic — as readers of this blog may have noticed, I have an affinity for eggy flour concoctions. I made the dumplings to go along with my favorite chicken recipe, and they added a perfect texture and flavor to the chicken and vegetable gravy.

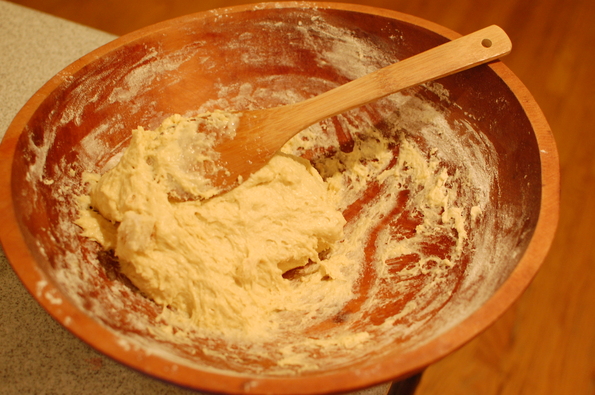
The consistency you're going for

The consistency you’re going for

Give them a shot — below is my description of the recipe, but I’ve included a scan of the authentic version too, for posterity.

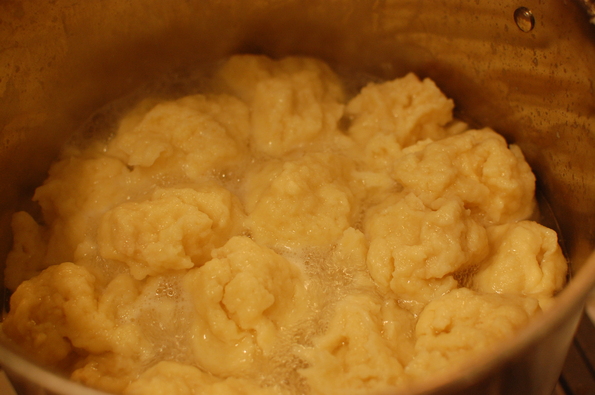
Everybody in the pool!

Everybody in the pool!

Recipe

Makes about 6 servings.

Original scan: Grandpa’s dumpling recipe

Ingredients

  • 4 cups flour
  • 4 eggs, room temperature
  • 1 tsp salt
  • Milk, room temperature
  • 1 slice of white bread

Directions

Toast the white bread. Cut into cubes, discard crumbs. Put a big pot of water on to boil. Your biggest pot — these guys need some room.

Sift flour and salt into a medium sized bowl. Sifting is important, as we want all of the lightness we can get since these dumplings don’t have any leveners of their own. Beat the eggs in a separate bowl with a whisk (I used an egg beater but a hand whisk would be fine too). When they’re frothy, add them to the flour mixture and stir with a wooden spoon.

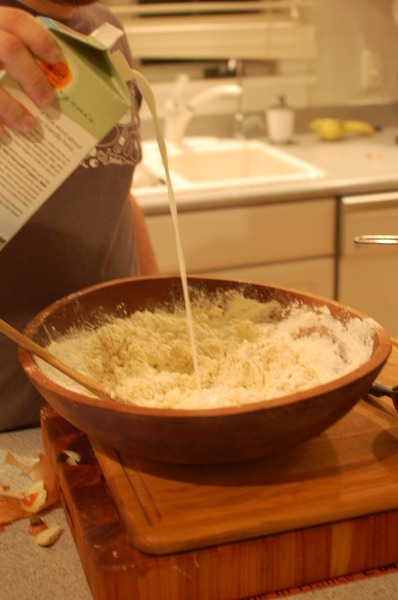
Add the milk until the dough is the consistency of putty. Stir in the bread cubes. Form dough into golf-ball sized clumps and add them to the water. I found that the best way to do this is to wet my hand and then grab a handful, form quickly into a ball, and drop in. When the dough starts to stick, wet your hand again.

Boil dumplings covered for 30 minutes, stirring after the first 5 minutes (make sure none are stuck to the bottom) and about every 10 minutes afterward. It’s not a huge problem if some of them aren’t fully in the water — just make sure to have the cover on so the steam cooks them.

Pull them out of the water after a half hour and slice immediately.
Pork Chops with Beet Ricotta Salad and Rosemary Garlic Turnip Gratin

We “subscribe” to Irv and Shelly’s Fresh Picks, which is a service that delivers fresh local vegetables to your door in the city once a week. As the weather gets colder, “local vegetables” increasingly means “root vegetables”, so last weekend we found ourselves with a vegetable drawer filled with beets, turnips, Japanese sweet potatoes, sunchokes and several other starchy root staples.

1image
I’ve gotten fairly sick of the standard medley of roasted tubers, and wanted to do something a little different. Irv and Shelly included a recipe which suggested preparing the turnips as a gratin, which sounded much more appealing. I generally approach gratins with some hesitation, as they are often ponderous affairs laden with heavy cream, mushy potatoes and overwhelming cheese, but with turnips and a different approach to béchamel, I figured I’d give it a try. On the beet side, beet salads are a personal weakness of mine, so that automatically fit the bill.
2image


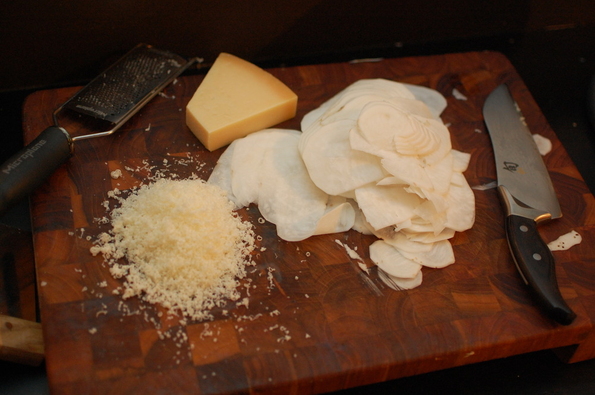
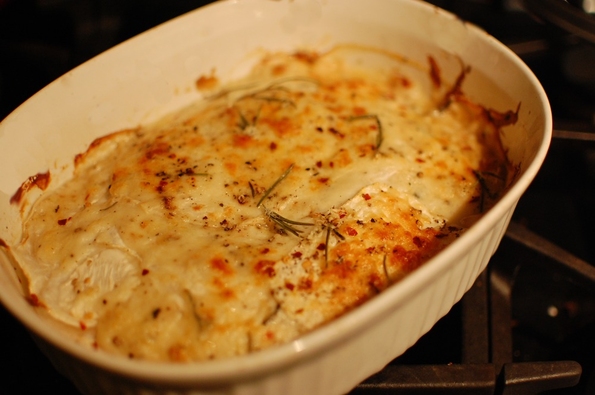
First let’s talk béchamel, the standard flour-thickened white sauce that is the base of everything from mac ‘n’ cheese to pancake lasagna. I’ve often seen it paired with nutmeg, which I find atrocious. Instead, I simmered garlic and rosemary in butter for a few minutes before adding flour to make the roux. I tend to add more flour than strictly suggested by the French — I add until everything is crumbly. After browning the flour, I poured in 2% milk and freshly cracked pepper and simmered until it was thick. What a difference — 2% milk, less butter than normal, garlic and rosemary turned this into a sauce that I could eat from a spoon. Once the white sauce was finished, I layered it on top of the turnip slices (cut with a mandolin, although you could use a sharp knife instead), fresh-grated parmesan, more black pepper, and red pepper flakes. Into the oven it went until brown on top.
Image


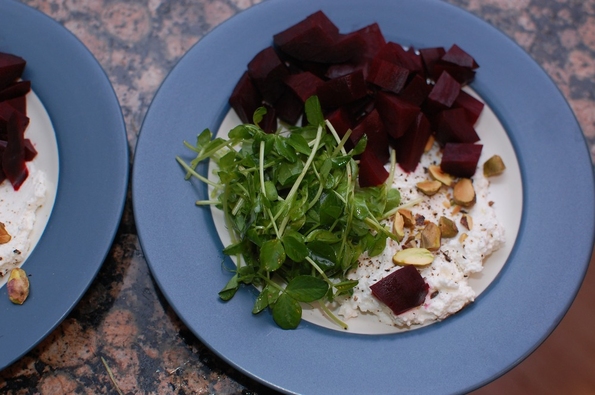
For the beet salad, I started with cubed roasted beets. Alongside those went a dollop of whole milk ricotta, topped with black pepper and pistachio kernels. I had pea tendrils from the Fresh Picks box, so I clipped them and added to the plate for some additional color. The dressing was a simple mix of fresh lemon, good olive oil from my friend Taso, salt, pepper, and a dash of dijon mustard to help emulsify everything. The lemony richness complemented the sweetness of the beets and the creaminess of the ricotta perfectly.


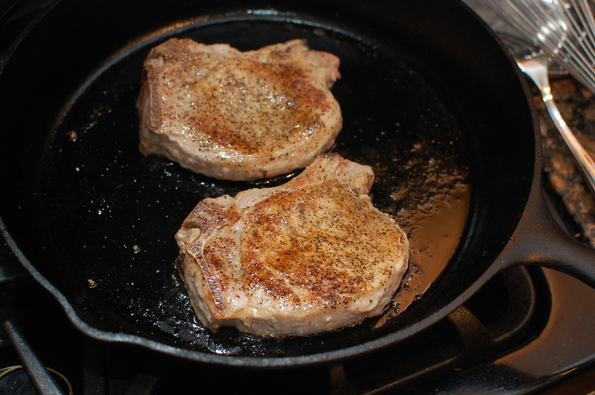
The pork chops, while good, were the least “interesting” part of the meal. I seasoned them with a rub from Spice House made of dried shallots, salt and pepper, and then cooked them on a hot cast iron skillet until golden brown on each side.
3image


While they aren’t pictured, Japanese sweet potatoes completed the meal. They’re interesting too — taste just like sweet potatoes, but have pale yellow flesh. All in all, we did a pretty good job of clearing out the root vegetable drawer, although we still have some more to go. I see some more gratins in my future!
0image


Carne Asada

Dsc_3413

I was having lunch the other day with a friend of mine, and we were trying to figure out what we should make for an upcoming barbeque. We wanted to move away from the standard burgers and dogs into something a little more interesting. He first suggested bone-in filets, which are always great, but I always feel like I can’t get quite the heat needed for a hearty, steakhouse char on my home grill. That’s not a problem for a lot of cuts of meat, but when it comes to filets, I want all the flavor I can get, and a nice sear alongside the bone is a big part of that.


I threw out flank steak as an alternative, served either as tacos or on top (or alongside) a Greek salad. His eyes looked at my quizzically — “isn’t that one of the inferior cuts of beef?”.


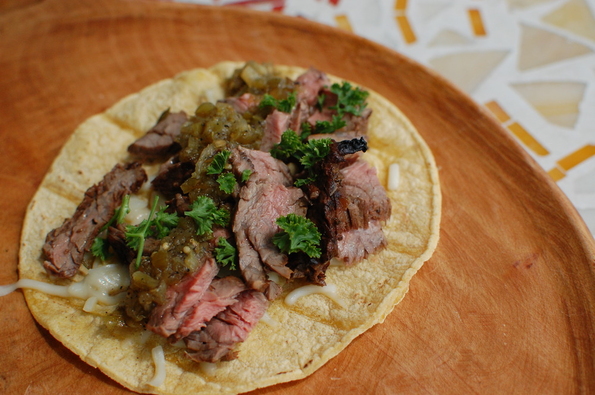
Flank steak, prepared and served like a normal steak, can be a chewy, tough affair. Long, tough fibers and generous marbling make for lots and lots of chewing if the cut isn’t handled the right way. However, those long fibers, and particularly, the beautiful marbling, create one of the most flavorful and delicious cuts of beef if they are marinated, cooked, and, most importantly, cut, the right way. Combined with a nice salad or fresh corn tortillas, flank steak is the perfect summer steak, and one of my favorite ways to cook beef at home. Of course, this is no secret to anyone who has enjoyed a steak taco hot off the grill at a taqueria — carne asada is simply marinated skirt steak (very similar to flank steak) grilled quickly and chopped up.


Yesterday I came home about an hour before I wanted to serve dinner with a 1.5lb piece of skirt steak in hand. The marinade is key, and I hoped that I could get good flavor in such a short time. Working off a mental list of my favorite things in a skirt steak marinade, I combined chopped fresh rosemary, chopped fresh garlic, soy sauce, lime juice, fresh black pepper, olive oil, and salt in a ziplock bag. I mixed it all up, added the steak, and pressed all of the air out of the bag. Since the meat was cold, I left the bag out on the counter for 45 minutes to bring it to optimum grilling temperature (room temperature) as well as more quickly infuse the marinade.


I then turned the grill up as high as it would go, and laid the steak across the grates. After roughly 4 minutes, I flipped the strip of delicious meat, and gave it another 4-5 minutes until the poke test felt like the meat was roughly medium-rare. Of course, you could also use a thermometer or even cut into the meat to determine if it’s cooked to your liking — although try to cut as little as possible, as cutting meat hot off the grill will cause juices to run out.


After a 10 minute rest of the cutting board, I cut the meat into strips against the grain. You can tell which way the grain is by looking closely at the surface of the meat and determining which direction the fibers are running. On skirt steak, the fibers run perpendicular to the length of the meat, so your cuts are going to be in the same direction as the long side of the meat. Once the meat is in strips, cut into smaller pieces for tacos or leave in strips for salad, and enjoy! For me, about 1/4 of the strips end up in my stomach right from the cutting board, but your mileage may vary.

Boxed wine?!

Ok, I’m going to go out on a limb here, and hope that my wine-loving family and friends don’t completely write off my judgement after this post. The subject, which is obvious from the title, is boxed wine. 

I’m a big fan, in theory, of wine from a box (well, technically a BiB, or bag-in-box, but you already knew that). I like the idea of being able to have a single glass on a weeknight without worrying about finishing off a bottle — the opened boxes last for about a month. I like the efficiencies of distributing wine in compact, lightweight, energy-saving packaging. About the only thing I don’t like is losing the ritual and anticipation that you get as you uncork a long-awaited special bottle. But on a normal night, when I just want an easy glass of above-average wine, a box is perfect.
Dsc_3112
I’ve read a few articles (in Wine Spectator and elsewhere) about rising quality in boxes, so I’ve set out to try a few lately. My first one was a California Cabernet by way of a Bota Box. Overall, not bad, but not really what I like in a wine — it was too fruity for me, with a bit of cloying sweetness. Not a “dump the rest in the sink” failure, but not something I’ll likely buy again. However, if you like a lot of juicy, berry fruitness and not a lot of tannic acidity, this might be the right one for you. 

The next time I was in Binny’s, I asked one of the guys what he thought about the boxed wines they carried. Having talked to this particular person before, I trusted what he had to say, and was interested to hear him recommend “any wines that aren’t made in California”. The rationale here was that many other countries don’t ascribe the same stigma to wines that come in a bag, and therefore feel like they can box some of their decent products. This in mind, I chose a Tempranillo (the grape from Spain that is used in Rioja) called Charla.

I’m drinking a glass now, and I’m very happy with the choice. Charla has much less of the fruity sweetness that I didn’t care for, and more of the back-of-your-tongue, balanced tannins that I really like in a wine. It’s exactly what I look for in an everyday bottle, and it comes in the vastly superior (at least for weekday wine) bag format. It pairs perfectly with some casual stemless wine glasses for some no-nonsense, “I’m in it for the wine, not the snobbery” drinking.

Give boxed wine a shot. I’m tossing around the idea of throwing a wine tasting party, and I might sneak in some Charla and try to win a few converts. As more people buy into the format, more good products will come. At the very least, the research is far from grueling.

Fresh Sardines, or the Most Aggressive Thing I’ve Cooked

I cook a lot of different foods from a lot of different cultures. I’ve made paneer cheese for saag paneer, stuffed sausage for brats, and cleaned squid for grilled calamari. However, up until very recently, I’d never cooked a whole fish from start to finish. Something about the process of cleaning, preparing and figuring out how to eat it always struck me as something to leave to the pros. 

Dsc_3003
One of my recent go-to favorites is sardines. Unfortunately, many people have an instant negative reaction to sardines — they think of the smelly cans of fishy-tasting fillets that are usually considered low-class food. I sprinkle some herbes de provence, pepper, olive oil and lemon juice and then broil them for a few minutes. Voila! A delicious, healthy and very sustainable food devoid of any fishiness or negative stereotypes (if something called “herbes de provence” doesn’t elevate the status of sardines, I don’t know what will — I don’t have anything in my spice rack with a more pretentious name :-).

With the canned variety under my belt, the next step was fresh. Several recipes caught my eye, and the glimmering pile of fresh sardines at my local fish market seem to beckon to me. I went there once or twice, resolute on picking up a batch, but wimped out. Finally, a day off of work and a determination to conquer whole fish brought me back to the market, bag in hand. Not even the fish market’s refusal to clean fish that small could break my spirit; I bought 8, and brought them home, ready to do some gutting.  
Dsc_3005
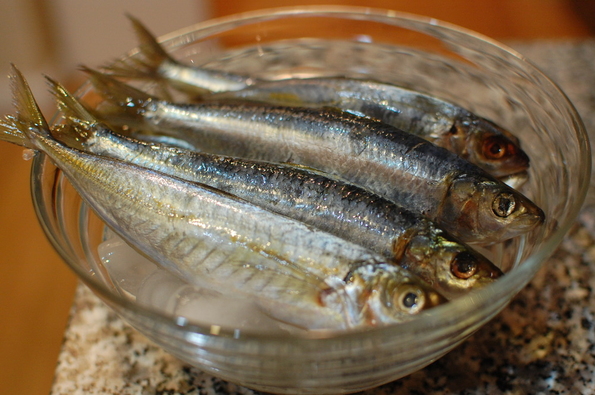
The gutting and scaling, while not hard, is relatively time consuming. There are a ton of videos and guides online for gutting sardines, so I won’t bore you with the details. The one thing I’d recommend very strongly is to avoid the sardines that have a rough spine-like bone along the side of the tail (you can see this “spine” in the front fish in the top photo). They are typically yellow around the edges. These are much, much harder to clean due to their bone structure.

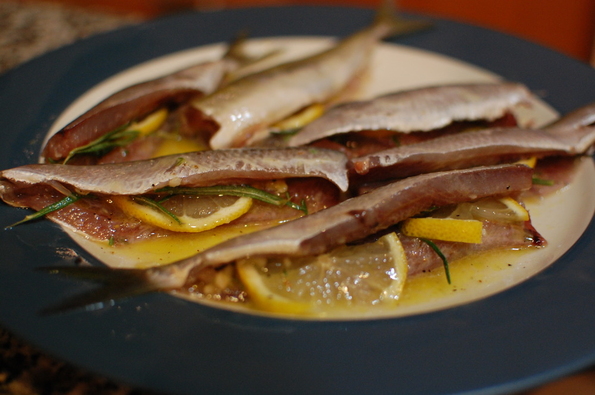
After the cleaning, I was left with 5 decent sized fillets ready for the broiler (I basically had to discard the yellow bony ones). I layered the insides with fresh lemon slices and drizzled a mixture of olive oil, herbes de provence, salt and pepper inside and out. They then went under the broiler for about 10 minutes, until the outside skin started to brown.

The verdict? Not bad, but not all that much better than the canned ones. Given the amount of work that went into the prep, I’ll be sticking with Brunswick canned sardines from now on. The bright side of the endeavor is that I’m now no longer hesitant to make whole fish — I’ve done the hardest ones. 

Puffy Oven Baked Apple Pancake

Perfect apple picking weather requires about 55 degrees, clear sky, and bright sun. Yesterday was perfect, so Sara and I headed to Kane County and harvested about 15 pounds of fruit, mainly Jonagold. About half of the bounty immediately went into apple sauce to be frozen and eaten over the next few months. The rest will be split up between pies, smoothies, regular ol' eating, and apple pancakes. It is apple pancakes that I came to speak of.

Dsc_2815

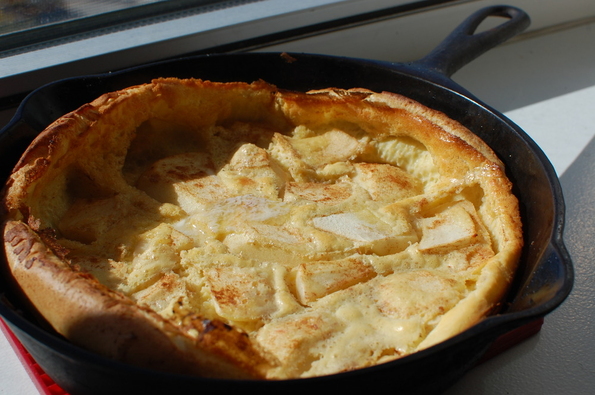
I'm a huge fan of light, airy, eggy foods like crepes, popovers, and Yorkshire pudding. Baked pancakes, at least the ones I've had and the ones I make, are basically crepe batter with some cinnamon poured into a skillet (cast iron ideally) with apples and baked until lofty and golden brown. The result is better than any normal, boring buttermilk — crispy, a bit chewy, and cinnamon-y. They're great with just a bit of maple syrup (don't disgrace them with Aunt Jemima), lemon and sugar, or, best of all, the juice left over after you toss the apples in lemon, brown sugar, and cinnamon. It's a perfect Sunday breakfast, and actually comes together surprisingly quickly — about 10 minutes of prep and 20 minutes of baking. Try it now, while the apples are still delicious and the weather is crisp.

Puffy Oven Baked Apple Pancakes (serves 4)

Ingredients
  • 3/4 cup all purpose flour
  • 3/4 cup milk
  • 3 large eggs
  • 1 tablespoon butter
  • 1/4 teaspoon salt
  • 1 apple, sliced thinly
  • 1/4 cup brown sugar
  • 1/2 or a bit more cinnamon
  • about 2 tablespoons lemon juice (either fresh or bottled is fine)
  • 1/4 teaspoon vanilla (optional)
Directions
Preheat the oven to 425 degrees. 

Put your skillet on the stovetop and let it get hot. Turn off the heat, and add the butter so that it melts and coats the bottom. Set aside.

Whisk together the brown sugar, lemon juice, cinnamon in a large bowl. Add the apple slices and toss until they're all thoroughly coated. Leave them in the bowl.

Add milk, eggs, salt and vanilla together in a blender or food processor. Start it up, and gradually add the flour. Turn it up high for 5-10 seconds — the goal is to whip air into the mixture to cause it to puff up more when you bake it. If you are mixing by hand, whisk vigorously for about 30 seconds. Don't blend for more than 10-15 seconds or it could cause the batter to over-stiffen.

Pour the just-mixed (if you've let the batter sit for more than a few minutes, whip it up for a few more seconds) batter into the skillet coated with melted butter. Arrange the apple pieces on top. Bake for 15-20 minutes, until the pancake has puffed and the middle is beginning to turn golden brown.

Serve with some butter on top and drizzed with maple syrup, brown sugar, or (best of all) the juice left over in the bowl from the apples.

Seared Ahi Tuna on Arugula

Sometimes Pizza Fridays needs a bit more than just pizza. Tonight I seared some Ahi tuna before my pesto, buffalo mozzarella and cherry tomato pizza.

Dsc_2776
If you can find a great piece of tuna (look for Atlantic Ahi tuna, it’s not horribly overfished like many species out there), this dish is super easy but a huge crowd pleaser. Simply combine equal parts toasted sesame oil and soy sauce, and add a minced clove of garlic, some minced green onion, and grated ginger. Whisk it all together with a drop of dijon mustard (it will emulsify the oil and soy sauce without really changing the flavor). Feel somewhat free to substitute — if you only have powered ginger or raw sesame oil, it will work, since the quality of the fish is the real star. Marinade for at least an hour — a ziplock bag is perfect for getting the marinade in contact with all of the fish.

Now, get a pan screaming hot — crank up the heat as far as it goes. Don’t put any oil on it until the last minute, since there’s going to be a lot of smoke. Use a cast iron pan if you have one, since they’re ideal for the best sear. Right before you add the tuna, add a small amount of cooking oil to the pan. Sear each surface of the fish for about 1 minute (or possibly more if you like a bit more doneness), and then remove from the heat. Take your sharpest knife and slice into quarter inch pieces.

I served it on top of a bed of arugula (my favorite leafy green) lightly dressed with a vinaigrette made of sesame oil, lemon juice, a drop of mustard, and freshly ground pepper.  

Bruschetta Lasagna

Sara and I recently moved into a new place, so, of course, a housewarming party was in order. We’ve thrown parties in the past, mostly casual BYOB affairs with some chips and dip on the table. This one, however, we wanted to take up a notch and provide food and [of course] alcohol for all of our guests. We sent out the invitation a few weeks in advance, got back about 20 “yes”-es, and set the shopping list. One of my biggest fears is running out of food or alcohol, so I ended up buying 14 bottles of wine, 60 bottles of beer, and lots of hard liquor. Food-wise, I made bruschetta, and bought cheese, dips, and raw materials for 48 slider mini-burgers to whip up on the grill.

Dsc_2752

Ok, so maybe a little overboard. One of my critical oversights was that several of my friends are still “college partiers”, which means an RSVP of “Hey, I’ll be there with my 3 roommates” really means “Ya, we’ll probably show up, but who knows, we might end up hanging out at our place watching South Park instead”. All in all, we ended up getting about 14 people — a perfectly fine turnout. Except when you have food and drinks for 30.

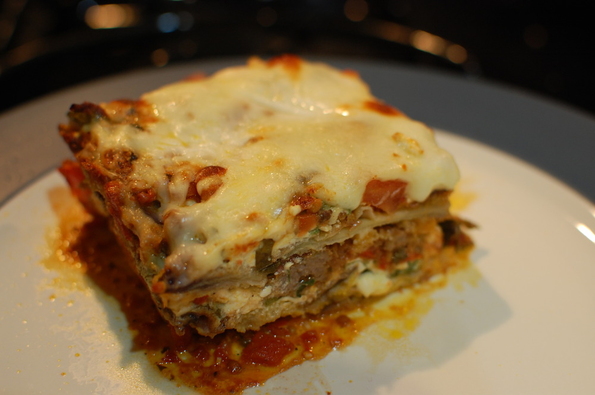
The alcohol isn’t really a problem — it won’t go to waste as football season gears up. Bruschetta, 5 lbs of ground beef, toasted bread and tons of cheese, on the other hand, doesn’t have much of a shelf life. Rather than throwing out huge quantities of perfectly delicious food, I tried to think of a great dish that would use these ingredients and keep for at least a few days. Eggplant Parmesan Lasagna fit the bill perfectly — bruschetta mixed with the ground beef sounded about right for the sauce, toasted bread turned into crumbs would make for delicious crispy eggplant, and leftover cheese could top it all off.

The sauce was really the standout rock star of the dish. I started with last night’s bruschetta, a combination of tomatoes, sun dried tomatoes, basil, olive oil, parmesan, garlic and balsamic vinegar (just keep adjusting until it tastes good). I pureed about 2 cups in the blender until it was the consistency of pasta sauce and added it to a few patties-worth of ground beef that was browning in a saucepan. I cooked that for about 10 minutes, and then added the last cup of the bruschetta to create a flavorful sauce with chunks of juicy tomatoes and ribbons of fresh basil. 

I thinly sliced the eggplant, salted it and let it drain for about an hour. I then lightly coated the slices with flour, dipped them in beaten egg, and coated them with bread crumbs from last night’s toasted baguette. I arranged the slices onto a sprayed cookie sheet and baked them at 425 until the tops were golden brown and crispy, about 20 minutes.

The middle cheese was simply a mixture of cottage cheese (which I prefer to ricotta), spinach (optional, had some in the fridge), parmesan and an egg. 

Now, I just made a few layers — sauce on bottom, then eggplant (or lasagna noodles), cottage cheese mixture and more sauce — until I filled up the pan. Topped it all off with shredded cheese (mozzarella or whatever you have), and baked it for about 30 minutes or so, until the top got just a little bit golden brown. Don’t brown the top too much, or the cheese won’t be as chewy and delicious.

A huge leftover win, if I say so myself. Most importantly, I learned some valuable lessons — bruschetta sauce is awesome, battered and baked eggplant is way better than noodles, and aim for enough food to feed about half of the RSVP’ed guests. The alcohol — well…who knows. You’d hate to run out. 

Grilled Peaches with Blue Cheese, Toasted Walnuts and Honey

Make this now.

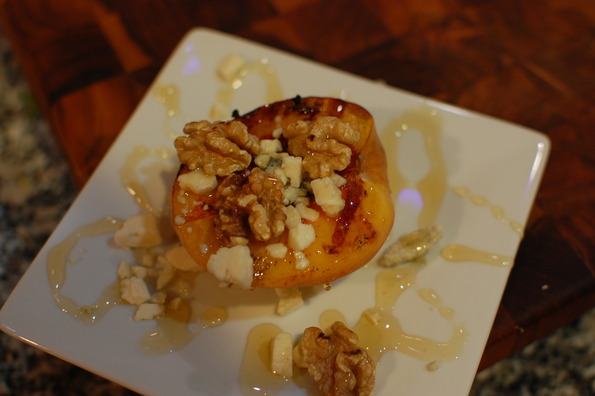
Nothing screams nice weather like fresh farmstand fruits, grilling, and lighter meals. We just came back from Michigan with a huge bag full of ripe peaches that we bought right at our favorite U-Pick farm, Twin Maple Orchards. Most of the fruit (meticulously peeled and pitted by my wonderful wife) went into either canned preserves or jam, ready to be opened on a dreary January day. However, a few particularly ripe fruits came home with us for what might be the ultimate use of fresh peaches.
Dsc_2737

The assembly is as simple as could be. Get the grill nice and hot and throw your peach halves on there. Give it about 5-10 minutes to let some of the sugars in the peach caramelize and the flesh get warm and soft. Take it off, top with blue cheese crumbles, walnuts, and a drizzle of honey. I toasted the walnuts in a skillet on the stovetop for a few minutes, but you don't even need to do that. Eat voraciously and contemplate making another helping.

The best part about summer cooking is just how easy it is to make things taste great.

No Wimpy Bagels Here

I still vividly remember the first time I had a real, New York bagel — I was an intern in lower Manhattan, about a week into my first rotation in the world of finance. Fridays anywhere are permeated with that pleasant tingle of an impending weekend, but something about the 13 hour days in my old office made everyone extra giddy when that last day rolled around. That specific Friday, one of the salespeople brought in bagels and lox for breakfast — maybe nothing special to the veteran New Yorkers in the room, but to a guy that had previously only eaten Einstein's and Great American Bagels, these were a revelation.

Finished

New Yorkers are infamous for claiming that everything about their city is "the best". Pizza, bagels, hot dogs — even the water — is held in almost absurdly high esteem by Big Apple natives. Being a Chicagoan, I was unimpressed by their floppy pizza, boring hot dogs and ordinary water (not that Chicago water is better…it's all just water). Bagels, on the other hand, might be the single food that actually is the best when it's from NYC. 

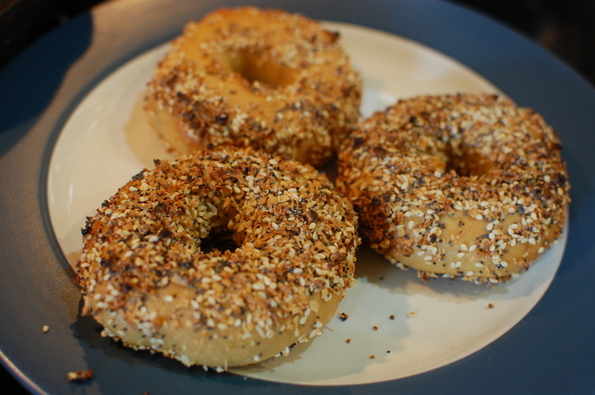
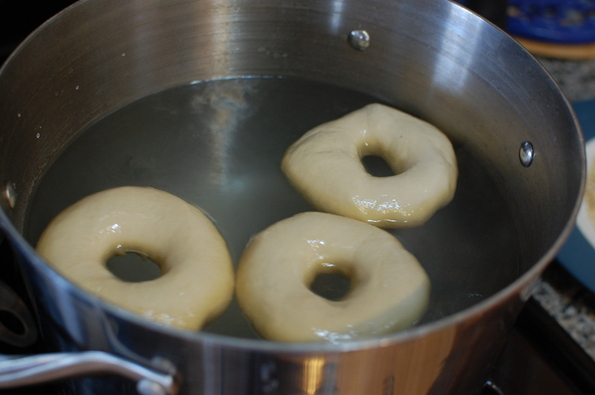
Most people claim it's the NYC tap water that creates the chewy outer shell surrounding soft inside that characterizes a New York bagel. In reality, it's a dose of alkalinity (lye, or absent that, baking soda), but the myth remains. For me, a great bagel is all about a jaw-exhausting chew and a heft crunchy coating of chopped onions, garlic, poppy seeds, sesame seeds, and kosher salt. Since I have yet to quite find this chewy, crunchy combination in Chicago (although there are some good places, NYC Bagel Deli and Bagel Art in Evanston come to mind), I set out to make my own.
Boiling
The recipe I followed was out of Peter Reinhart's The Bread Baker's Apprentice. I've had great luck with other breads out of this outstanding book (the pizza dough is featured heavily in this blog, and the french baguettes are incomparable), so I figured the bagels would likely also be astounding. The recipe, like many great bread recipes, is a bit time-consuming due to several stages of rising and fermentation — but the results are worth it. Mixing up a big batch of dough on a Thursday or Friday evening and then boiling and baking the next day will yield about a dozen delicious bagels. They may not be authentic H&H, but they're almost as delicious.