Mmmm Mofongo

The first time I heard about mofongo was on the Food Network. The host was interviewing the chef at Benny’s Seafood (I’m guessing it was Benny) in Miami, famous for their authentic Puerto Rican fare. What struck me about Benny’s take on mofongo wasn’t the flavors, or colors, or textures — it was the way he put the whole mixture into a big cylindrical mortar and then used a baseball bat as a pestle, crushing the fried plantains and chicharrónes to a delicious mush. It just looked cool.

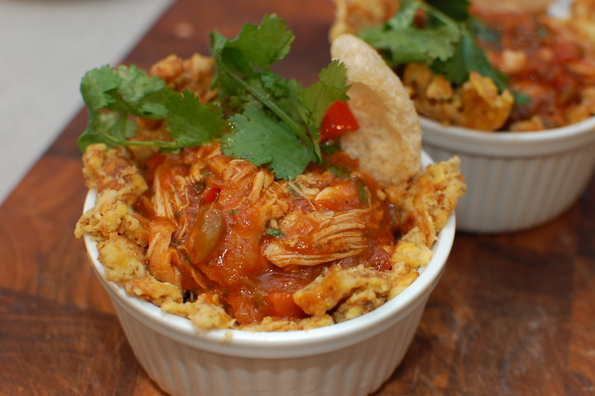
Mofongo with Creole Chicken Stew

First, for those of you that missed that episode… what is mofongo? Mofongo is a dish made out of fried plantains, traditionally mashed together with fried pork skin. It’s popular in Caribbean cuisines, and I see it most associated with Puerto Rico. The plantains form a starchy base upon which a hearty protein is layered. In my case I added a creole-style chicken stew, but you’ll often see shrimp, pork or soup on top as well.

My culinary foray into Puerto Rico began one weekend when I was trying to think of something relatively exotic to make. For a couple reasons, mofongo fit the bill, so after a bit of searching to find the perfect recipe, I was on my way to a local Latin American grocery store to get the ingredients. On the way, I made a call to a close friend of mine and Puerto Rican cuisine expert (hi Chris!) to get the inside scoop on the “right” way to make a proper mofongo. He suggested mixing a sweet (slightly more ripe) plantain in with the green plantains, and advocated topping it with either shrimp or chicken stew. Apparently the cool kids these days lean toward shrimp as a modern and slightly healthier take on a classic.

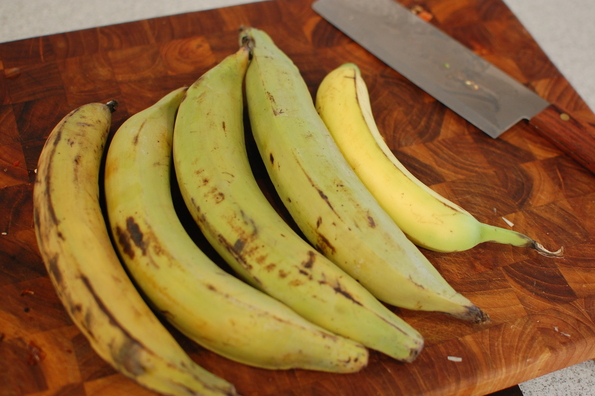
Plantains

One of these things is not like the others…

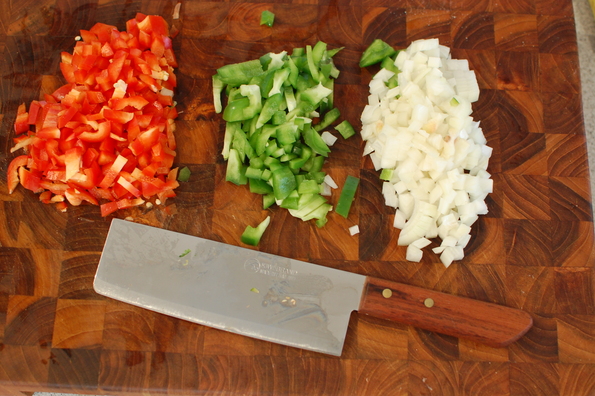
Plantains, pork rinds, chicken, a banana, and sofrito ingredients in hand, I began following the recipe. The first step, as Chris always says, is making the sofrito. Sofrito is the base of most Puerto Rican cuisine, and consists of bell peppers, onions, garlic and cilantro. It resembles (in spirit and composition) mirepoix in French cuisine, holy trinity in Creole cuisine, and probably a variety of other regional flavor bases.

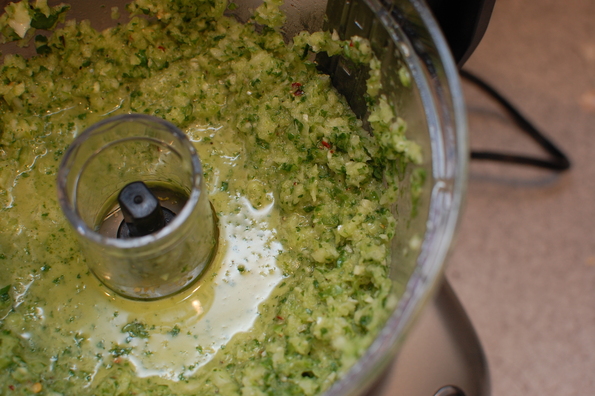
Sofrito

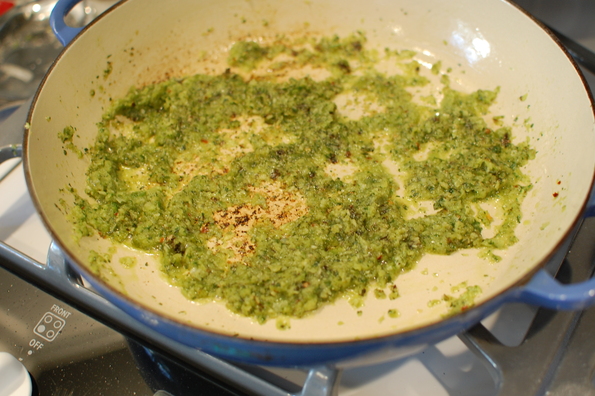
After assembling these ingredients and giving them a spin in the food processor, I cooked them in olive oil until they darkened slightly and started to form a fond (brown bits) on the bottom of the pan. This is the base of the dish, and adds much of the structure and deep flavors, so whenever I cook sofrito, mirepoix, tomato bases or similar, I always make sure to take lots of time and get the browning right.

DSC_0456

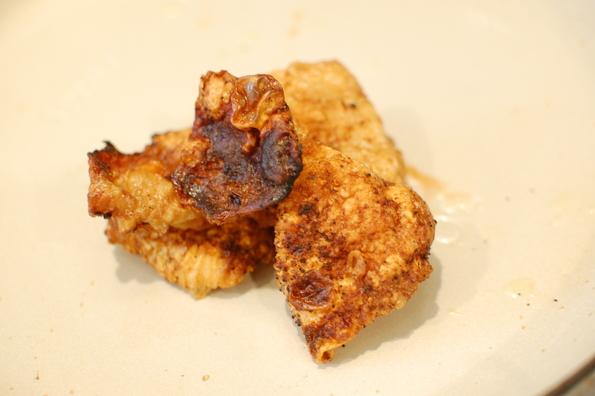
As the sofrito was cooking, I took four bone-in, skin-on chicken thighs and put them under the broiler. Ultimately, I planned on cooking the chicken for a long time in the sauce, so my goal was to just get some basic browning (again, brown foods taste good!) on the meat before I incorporated it in to the rest of the sauce. After about 10 minutes or so, the skin on the chicken was a deep mahogany. At this point, I changed my plans slightly — the recipe called for pork rinds to be mashed into the mofongo, but why not amp up the chicken flavor and use the crispy chicken skins instead? To get the crispness I was looking for, I removed the skins, gave them a few more minutes in the heat, then set them aside.

Crispy chicken skins are even better than pork rinds

Crispy chicken skins are even better than pork rinds

The rest of the stew came together unceremoniously — if you’ve ever made stew, gumbo, or chicken the steps will be familiar. To the sofrito base, I added tomatoes, more bell peppers, more onions and some homemade duck stock (I was out of chicken stock) from the freezer. For even more flavor, I used more stock and tomato juice than the recipe called for, and reduced it down after everything came together. Next I added the thighs, cooked vigorously for about 30 minutes, then cooked it on low for a few more hours until we were ready to eat. Right before plating, I removed the chicken from the bones, shredded the meat, and mixed it back in.

DSC_0467

The last step was the mofongo itself. Plantains were a little tricky to peel at first, but once I got them going it was pretty easy. I had bought a banana at the store to use just in case none of the plantains had the slight sweetness that my friend had suggested, but fortunately they were all perfect on their own. I sliced them, and fried them in 375 degree oil in small batches. The small batches are important — it’s incredible how much the oil temperature drops with each new batch, even in a heavy cast iron pot.
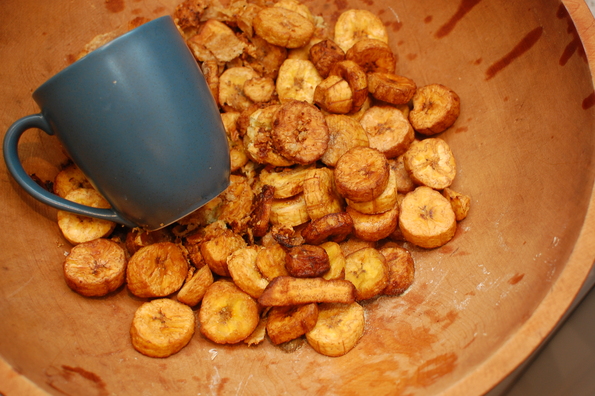
 

DSC_0521Once all plantains were fried, the last step before plating was mashing. I looked around and found a wood salad bowl that would act as a perfect mortar. Now I just needed the right club to smash them with. Since I didn’t have a baseball bat handy, I first tried the bottom of a glass (too dangerous), the side of a coffee mug with a handle (awkward and kind of dumb), and finally found the perfect smasher — a meat mallet (duh). I mixed in the chopped crispy chicken skin and proceeded to mash away. The mixture was a bit dry, so I added whole milk until I got the consistency I was going for (hard to describe, but much drier and lumpier than mashed potatoes).

Final step — plating and eating! I formed the mofongo around the sides of a ramekin, ladled some stew on it, and dug in!
 

Thomas sees bananas and is instantly interested

Thomas sees bananas and is instantly interested


Here’s the recipe from Bon Appetit

Paella Night

Last night, Sara and I hosted 6 of our friends for a Spanish-themed dinner party. It was the biggest full-on dinner party we’ve had so far, and I had promised paella for the crowd. I’ve made paella several times, but this was the most people I’ve ever cooked a full dinner for, so it was a bit more intimidating than a normal Sunday dinner. We started cooking and preparing at about noon that day, and had everything in place by the time the guests arrived.

Dsc_3263
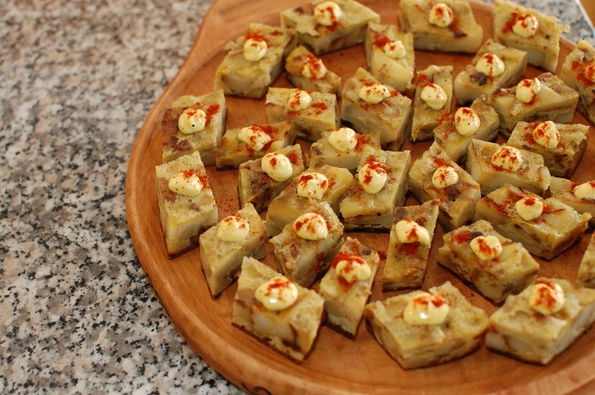
The night started with some appetizers — Sara made her amazing bacon-wrapped, almond-stuffed dates. If you’ve had normal bacon wrapped dates, let me tell you, the almond is a revelation. Dipped in a tangy sauce made with apricot jelly and balsamic vinegar, these little rolls are heaven on a toothpick (Unfortunately, I don’t have a picture of these, or Sara’s equally amazing flan — but if she starts a food blog, these should be the first entries). On my end, I made a tortilla española, or Spanish omelet. One of my go-to tapas, tortilla española is made with pan-roasted potatoes and onions, bound together in omelet form with beaten eggs. I topped it off with a dollop of garlic saffron aioli (piped through the corner of a ziplock bag) and finished with a shake of Spanish paprika. The creamy, saffron-spiked aioli and bright, smoky paprika went perfectly with the savory, salty goodness of the onions and potatoes, so if you make the tortilla, do the aioli too. We rounded out the first course with a delicious selection of Spanish olives, tomatoes and cheeses, courtesy of my friend Caroline. Along the way, we staved off thirst with crisp, bubbly Cava (courtesy of Chris, Mike and Jen-Jen) and cool, fruity, deep purple sangria (thanks JM2K).


Dsc_3252


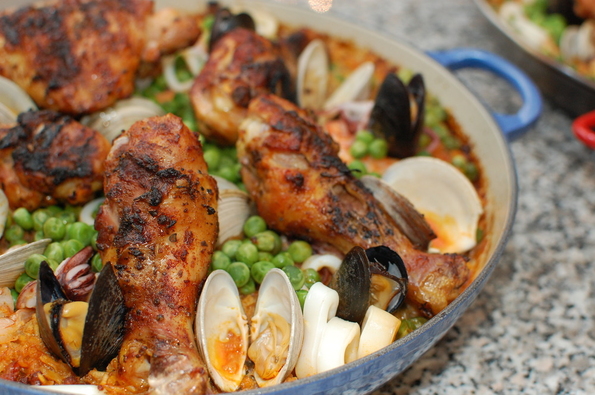
The main attraction was, of course, paella. There are a few things in my mind that make a great paella — the occasional bite of smoky chorizo, the crispy rice (called socarrat) at the bottom of the pan, and the sweet floral aroma of saffron that hits you as you bring the rice to your mouth.


My general procedure is to begin with spicy chorizo, sauteeing it until the sausage pieces turn a dark brown, almost black. Chorizo is a blood sausage, so it’ll get nearly black when they’re done — wait for this stage, and you’ll be rewarded with crisp, crumbly slices. From there, I add my onions and garlic, sauteeing them for about 5 minutes in the chorizo fat. Next comes the rice, enough to cover the bottom of the pan about a quarter inch. The next steps will be familiar to those of you that have made risotto. Toast the rice for a few minutes until it starts to get a bit brown, fragrant, and crackly. Then, add in your liquid a few ladlefuls at a time, allowing the rice to absorb it slowly. For my liquid, I combine chicken stock and clam juice, and add the shells from the shrimp. I simmer these shells for a while (about a half hour if you have the time, longer is fine too) to add a fresh shrimp flavor, and then remove them. About 5 minutes before you’re ready to add the liquid to the rice, crumble a generous pinch of saffron into the broth and allow it to infuse, turning the stock a bright shade of yellow.


Continue to ladle the stock in until most of the liquid is absorbed — I generally shoot for 1.5 cups of liquid for every cup of rice. When you’ve hit your target, start adding your seafood, peas and chicken. I take a more-is-more approach and add mussels, clams, calamari, shrimp, peas, and chicken. This time, I pre-cooked the chicken on the grill (but not all the way) to give it crispy, crackly skin before it went in the pan. Finally, I covered my pans loosely with foil and stuck them into the oven for about a half hour to cook the seafood and let the rest of the liquid absorb. Traditionally, paella is cooked entirely over an open flame, so the oven part was cheating; however, with guests over, I was happy to let the food cook hands free for a half hour or so while I chatted with my friends.


We finished off the night with an outstanding vanilla orange flan that Sara made. Flan is in my top three favorite desserts (with key lime pie and tres leches cake), so this capped off our fiesta perfectly.


—-
Recipes


I kind of just winged it for the dishes I made above, but I read these as a starting point. Use them as a start, but feel free to make modifications along the way


(Notes: used chicken stock, clam juice, shrimp shells as the liquid. No lobster, used shrimp. Used his spice rub for the chicken and it was good)


(Note: I didn’t use anywhere near as much oil as they call for — just add a few tablespoons and sautee the potatoes and onions until brown. Add more oil if you feel like the mixture is sticking. I also never flipped the omelet — I cooked on the stovetop in a cast iron pan, and covered it for the last few minutes until the top set.)


(Note: instead of roasting the garlic, I deep fried it in about 1/4 cup of canola oil. When it cools, you can then use the garlic-infused oil to add more flavor to the aioli. Also, this recipe makes WAY too much — I used one yolk, 1 Tbsp of lemon, a pinch of saffron and the added oil as necessary to create the immulsion. Even with 1 yolk, it was a HUGE amount)

Beef Tenderloin Stuffed with Roasted Red Peppers, Goat Cheese, Basil and Spinach

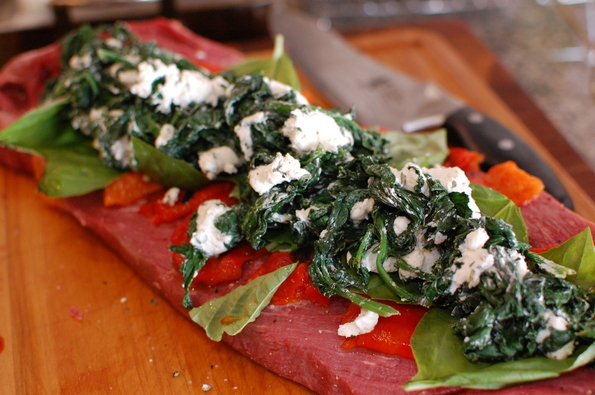
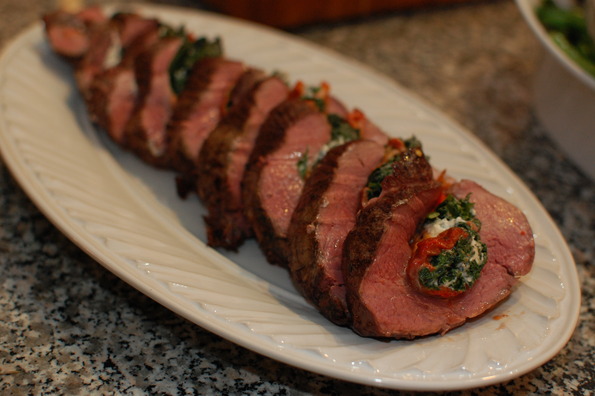
Yesterday was my mom’s birthday, so I wanted to cook something a bit nicer than usual. Many years back, my dad made a beef tenderloin from a recipe in Bon Appetit (at least he says that’s where it was from — I found no record of said recipe on the internet). It was spectacular — buttery soft tenderloin with the earthy sweetness of red peppers and the tang of goat cheese. I’ve asked him a few times since to make it, but to no avail — it is quite a bit of work, so not necessarily an everyday recipe.

Dsc_3117
I’ve never made a tenderloin before, and I did find myself intimidated — as far as meat comes, tenderloin is pretty expensive and relatively unforgiving. Cut it wrong, and it will be very difficult to stuff properly. Overcook it, and there is very little buttery fat to hide the sin. After unwrapping the package I got from my local butcher, I stared down at it for a good three or four minutes, trying to figure out how I was going to butterfly it. The tough part is the thicker end, where the loin is basically two pieces, so one cut won’t butterfly both.
Dsc_3126
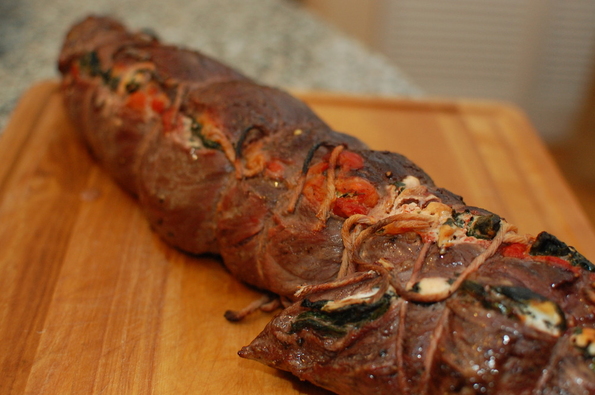
I ultimately opted to give each part its own cut and stuffing (although I left them connected). The next step was stuffing it with the red peppers, basil and goat cheese mixture. Layering these ingredients over the butterflied meat (which I also pounded to about 3/4″ thin) was easy — tying it all up, however, was more of a challenge. The thing that really saved me was the butcher’s knot, which I had come across earlier that day as I investigated the best way to tie up a roast. A butcher’s knot is designed to allow the cook to cinch tighter by simply sliding the knot up the string.
Dsc_3127
I cooked it to a beautiful medium rare, and served it with bay-scented domino potatoes and garlic sauteed green beans.


Recipe:


[If you look at the recipe — I made the port wine sauce, but ended up not serving it. The sauce recipe as it stands was too tomato-y for me, so if you make it, I would suggest starting with only a spoonful of tomato paste, and adding more as you see fit.]