Showin’ Off Your Mussels

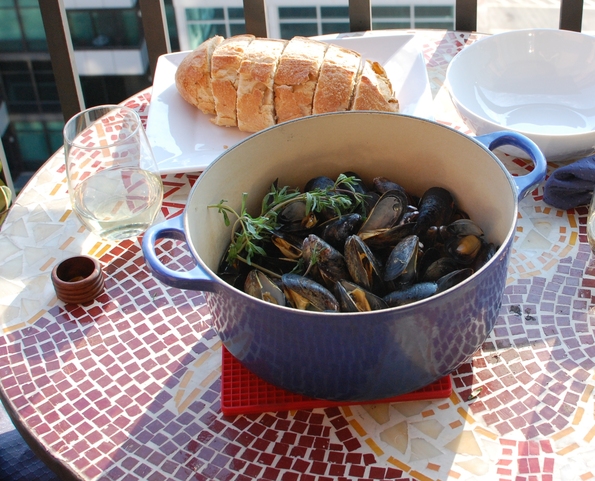
Mussels are a special occasion food — the best I’ve ever had was at the Auberge du Soleil hotel bar in Napa, California. The Auberge bar is perched on a hill, overlooking the entire valley. The cocktails were great, the mussels were spectacular. Sure, a big part of the experience was the view and the company, but the Staube pot filled with buttery broth, heady herbs and meaty mussels alongside a loaf of crusty bread certainly capped everything off.

mussels3

But here’s a little secret — for all the fanfare, mussels are surprisingly easy to make. I’d certainly consider them one of the best bang-for-your-buck dishes out there. Trying to impress a girl (or guy) with a great dinner on a special occasion? You can’t go wrong with mussels and champagne. They’ll take you about 20-25 minutes, start to finish, and most of that time they’re just sitting in the pot, soaking up flavor.

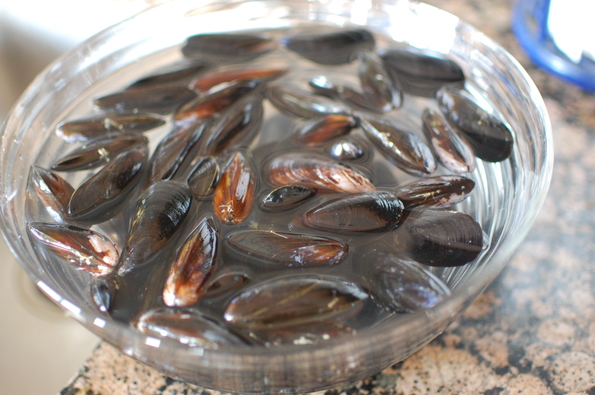
Start by picking up a bag of mussels at the store — look for minimal cracked shells and a fresh scent that smells like the ocean. When you get them home, spot check them all as you drop them into a cool bowl of a water, throwing away any cracked or open (a little open is OK, a lot open is not) ones. Let them sit in the water for about 5-10 minutes to clean them off.

DSC_5060

The broth is the fun part — Ina Garten has a complicated recipe that takes an hour and looks delicious. I, on the other hand, typically just wing it — the essential parts are butter, herbs, white wine and garlic. Preheat the oven to about 350 degrees for your bread. Start by adding about 2 Tbsp of butter (more is better) to a cast iron dutch oven or large saucepan. If you have about 1/2 of a finely chopped onion or a shallot, add it and cook until soft, about 4 minutes. Add 2 cloves of minced garlic and a sprig of fresh thyme (or about 1/2 tsp of dried thyme). If you’re feeling complicated, you can add in a teaspoon of flour at this stage and brown it a bit — it will thicken the final broth slightly. From here, add about 1/2 bottle of white wine (or less wine and some chicken broth or water if you prefer) and bring to a simmer. Pour out the cold water that your mussels are swimming in and add them to the pot — you don’t need to cover them all with liquid, as steam will cook the upper ones. Now is also a good time to put the bread in the oven.

DSC_5074

Put a lid on the pot and cook the mussels for about 10 minutes, or until all of them are opened. Serve alongside the bread, and throw away any mussels that didn’t open. Crack a bottle of champagne, and you’re an instant hero.
Biscotti — A Cookie Shaped for Dipping

When I was little (ok, still) I used to love Chips Ahoy! cookies. The problem lay in our glassware — my family had the tall Collins glasses that didn’t quite fit the circumference of a store-bought chocolate chip cookie. Homemade cookies? Forget it. The solution, of course, was to bite off a piece from the side and then dunk the remaining portion into the cold milk. I always felt cheated though — somehow, that first not-mushy bite felt like it defeat the purpose of a cookie; almost like alternating delicious dunks with boring broccoli.

 DSC_4347

This post of course has nothing to do with milk, Collins glasses, or Chips Ahoy. It is instead a celebration of biscotti, the perfect cookie to eat for breakfast, alongside a nice mug of tea or coffee. It’s a cookie that knows what it’s audience wants — dunkability. The long shape ensures ample area to hold onto while you dunk it multiple times to ensure that sweet spot between crispy wetness and soggy mush.

Biscotti in Italian means “twice cooked”, and it is this double cooking process that gives the cookie logs their satisfying crunch. I prefer mine made pretty traditionally — anise seed and almonds. Not that I don’t like chocolate, but a bicotto should have nothing between the cookie and the liquid it’s dunked into. I also find chocolate to be a little sweet for breakfast, but maybe that’s just me.

There’s a great recipe on Epicurious that I followed here which turned out amazing. Be sure to bake them until they’re nice and golden brown — you want to cook out all of the moisture, otherwise they’ll be hard and not crisp. Use a very sharp serrated knife for the cut, and cut them while they’re warm, otherwise you risk crumbling.

Bring them to work, and they’ll be the hit of the office…or enjoy them all yourself.


Link:
Epicurious: Almond Anise Biscotti


Popovers

Cooking is best when there is a story, an event, a gathering. One of the things I love most about food is that it’s the center of so many great things — it combines friends and family, art and nourishment, gadgets and fire. For most of us, many early memories come from watching our mothers, fathers, grandmothers, aunts — whoever — in the kitchen creating a meal or a dish. Foods we eat become associated with those people, and preparing them becomes a great way to look back on fun times.
Dsc_3782


Popovers will forever be associated with my Aunt Candy. I vividly remember staying over at her place with my cousins and whipping up these puffy, crispy, eggy rolls and eating them hot out of the oven with an assortment of delicious, sweet toppings. It was the perfect snack for a sleepover — easy to whip up with ingredients on hand, versatile, and eminently satisfying. It’s not so much that we made them all that often — realistically, it was probably not more than 2 or 3 times — but until then, I had never eaten a popover, and hadn’t really revisited them until I started making my own.


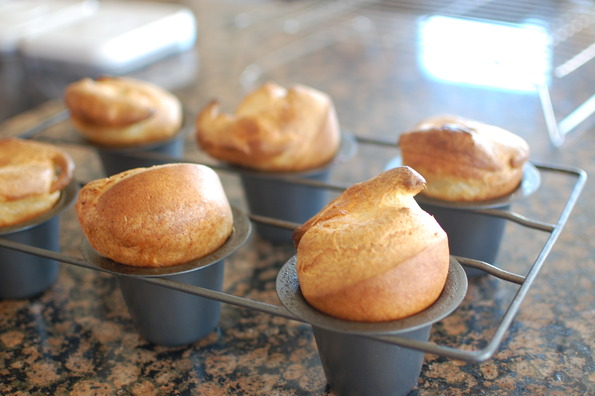
Popover come from a delicious family — Yorkshire pudding, crepes and puffy baked apple pancakes are all made with a very similar batter. The main difference is in the pan — a popover pan is similar to a muffin tin, but with even deeper cups. The deep cups give the popovers more vertical lift. Like the puffy baked pancake, the key to a lofty popover is whipping enough air into the batter, and using it relatively quickly (within 10 minutes or so). The small bubbles that form when you aggressively beat, whip, or blend the batter turn into steam inside the oven. The steam then propels the batter upward, where is is held in place by the proteins in the flour that start to solidify from the heat in the oven. Much like a balloon, the steam inflates the inside while the outside “skin” holds everything together. Pretty cool.
Image
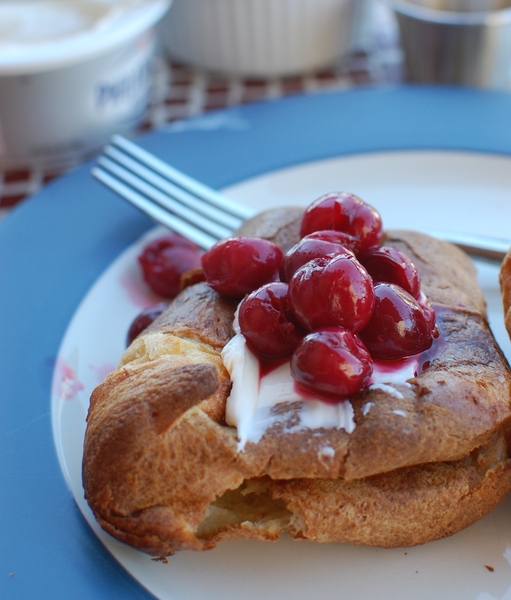
Enjoy it with just about anything — savory popovers with carne asada, bleu cheese and carmelized onions; sweet ones with cherries, cream cheese (or cottage cheese — my favorite — try it!) and a dusting of sugar, or butter, sugar and lemon. They store very well for a day or two in a bag on the counter, or frozen for longer.


Recipe:
I used Alton Brown’s recipe, but I found the salt to be a little much. Try 1 teaspoon, or less if you’re using toppings with a lot of salt.


A Need for No-Knead

At this point, it’s almost cliche in the world of food blogs to dedicate another page to Jim Lahey’s no-knead bread (a recipe popularized by Mark Bittman of the NY Times). It’s “easily the most popular recipe ever published in the New York Times” according to the New York Times Cookbook, and probably the most popular recipe on the internet. With that said, it is also one of my favorite recipes, and since this is my blog, I’m going to add a few more bytes to the topic.

Dsc_3162


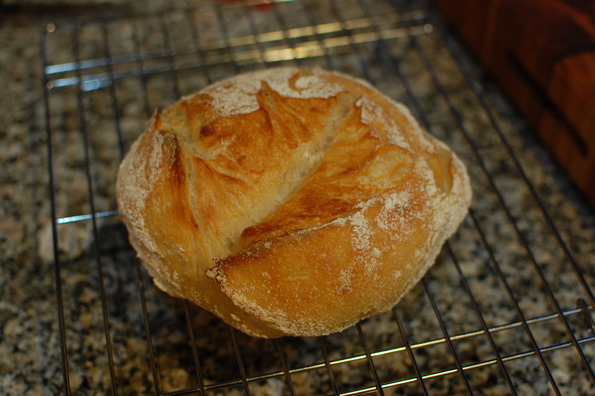
The beauty of no-knead bread for me is not the simplicity — I love cooking really complicated things, so I would have no problem kneading, punching and proofing bread if it yielded great results. Instead, it’s the irresistible flavor that comes from the day-long fermentation and crisp, crackly crust provided by the steam from the wet dough inside the dutch oven. I’ve burned my tongue on many occasions (OK…every occasion) of this bread leaving the oven, too impatient to let it cool.


Eat it right out of the oven (well, give it a few minutes) with just a little bit of butter — ideally unsalted. I’ve had it with olive oil and herb butter too, but unsalted fresh butter is my favorite, since the others cover up the taste of the spongy interior.  If you have any left, it makes a great sandwich, just be sure the slice at an angle so that the crust doesn’t cut the roof of your mouth.


Whip up the dough the night before, and it will be ready to go around dinnertime the next day.


———-


No-Knead Bread Recipe (from NY Times):


Adapted from Jim Lahey, Sullivan Street Bakery
Time: About 1½ hours plus 14 to 20 hours’ rising


3 cups all-purpose or bread flour, more for dusting
¼ teaspoon instant yeast
1¼ teaspoons salt
Cornmeal or wheat bran as needed.


1. In a large bowl combine flour, yeast and salt. Add 1 5/8 cups water, and stir until blended; dough will be shaggy and sticky. Cover bowl with plastic wrap. Let dough rest at least 12 hours, preferably about 18, at warm room temperature, about 70 degrees.


2. Dough is ready when its surface is dotted with bubbles. Lightly flour a work surface and place dough on it; sprinkle it with a little more flour and fold it over on itself once or twice. Cover loosely with plastic wrap and let rest about 15 minutes.


3. Using just enough flour to keep dough from sticking to work surface or to your fingers, gently and quickly shape dough into a ball. Generously coat a cotton towel (not terry cloth) with flour, wheat bran or cornmeal; put dough seam side down on towel and dust with more flour, bran or cornmeal. Cover with another cotton towel and let rise for about 2 hours. When it is ready, dough will be more than double in size and will not readily spring back when poked with a finger.


4. At least a half-hour before dough is ready, heat oven to 450 degrees. Put a 6- to 8-quart heavy covered pot (cast iron, enamel, Pyrex or ceramic) in oven as it heats. When dough is ready, carefully remove pot from oven. Slide your hand under towel and turn dough over into pot, seam side up; it may look like a mess, but that is O.K. Shake pan once or twice if dough is unevenly distributed; it will straighten out as it bakes. Cover with lid and bake 30 minutes, then remove lid and bake another 15 to 30 minutes, until loaf is beautifully browned. Cool on a rack.


Yield: One 1½-pound loaf.